Quick guide to drone show design with Skybrush Studio
Skybrush Studio for Blender is a professional drone show designer framework integrated into Blender. In this tutorial we will show step by step how to create a drone show from scratch with it.
In this tutorial we assume the following:
-
You have a basic understanding of Blender and its capabilities
-
You have successfully installed the Skybrush Studio for Blender to supplement Blender with all available Skybrush tools. Refer to the Installation chapter if you haven’t done so yet.
-
You have read and understood the Key concepts chapter of this manual.
1. Initialize the show framework in Blender
Press N in the 3D Viewport editor to open its sidebar.
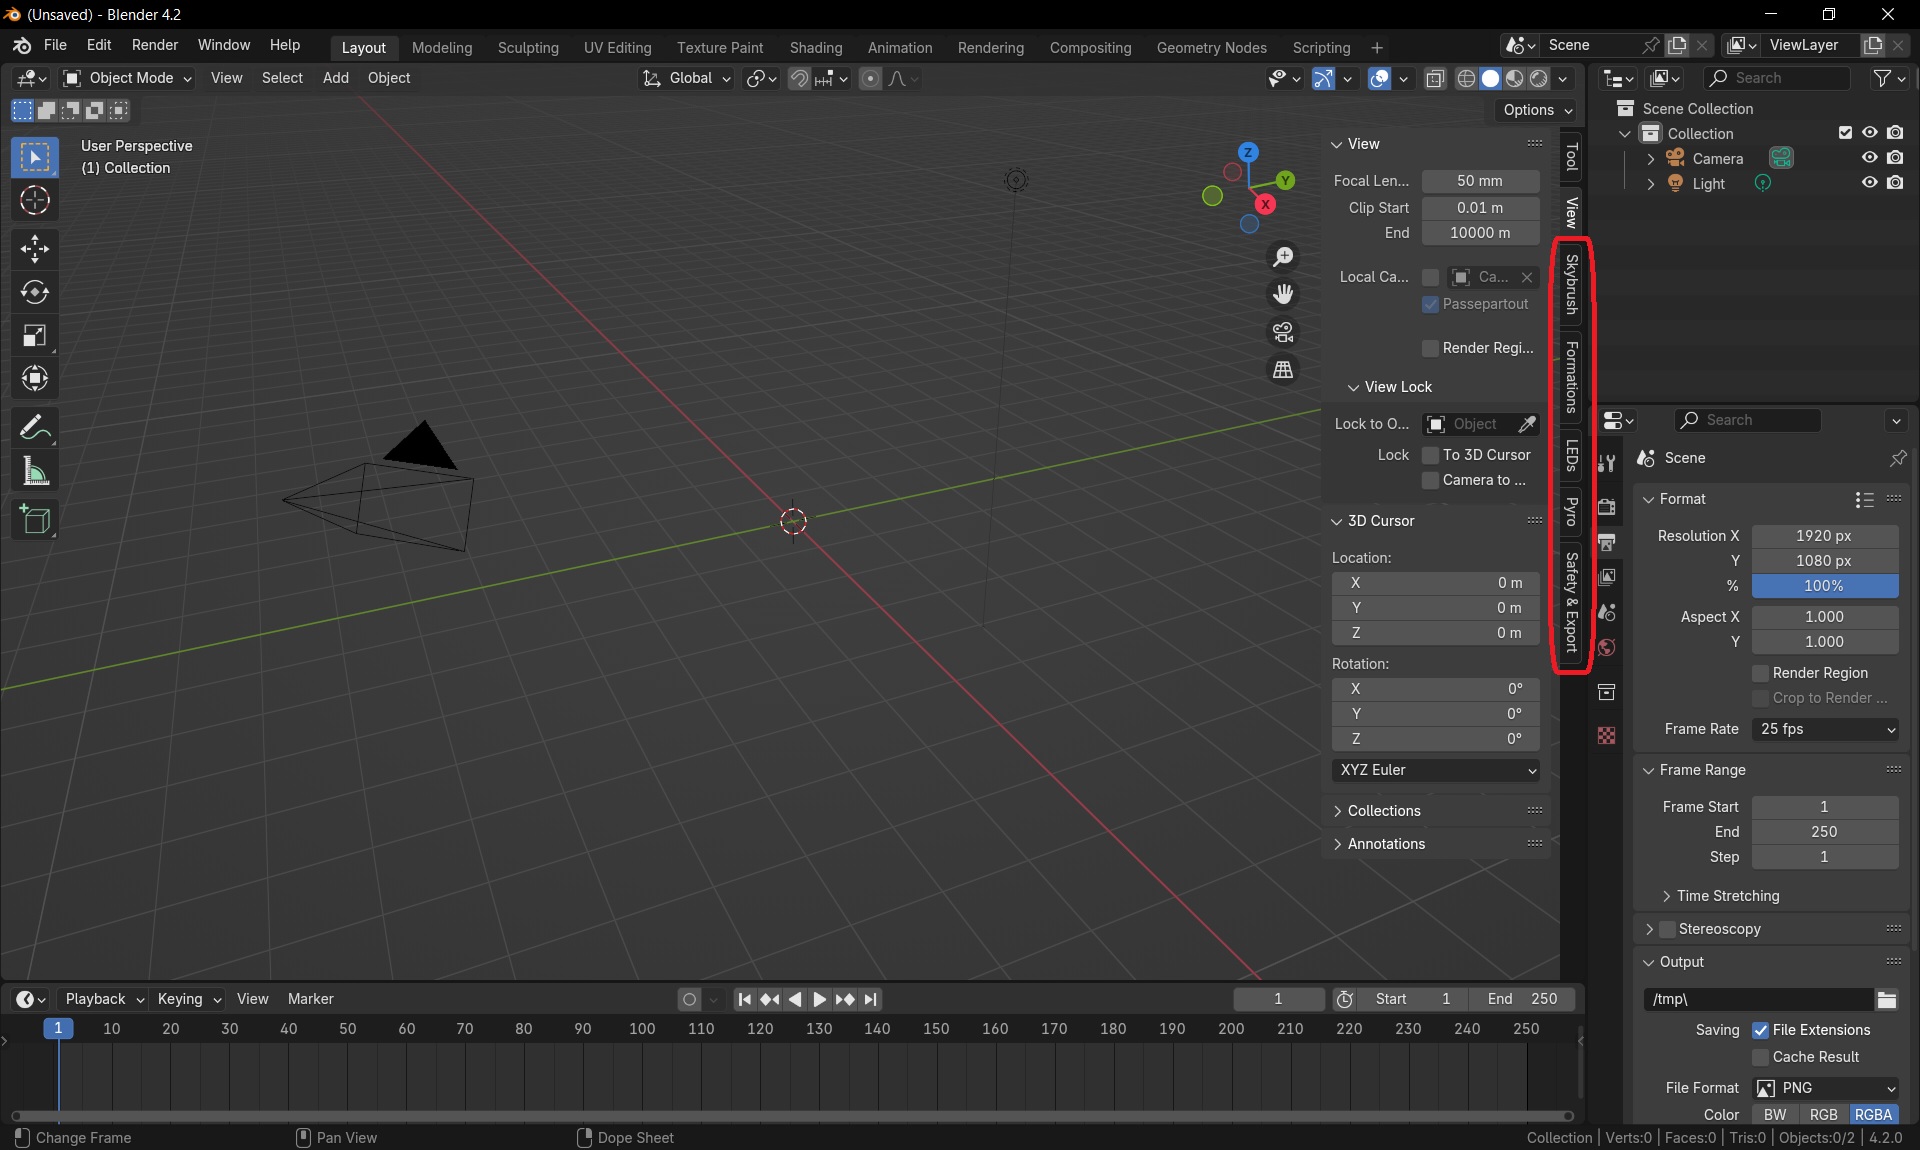
You will see five new tabs related to Skybrush Studio:
These tabs contain all panels, buttons, operators and functions that are specifically needed for drone show design, in proper order.
The first two panels of interest are the Show panel and Swarm panel on the Skybrush tab.
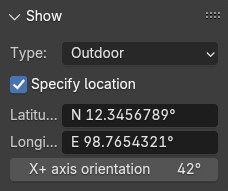
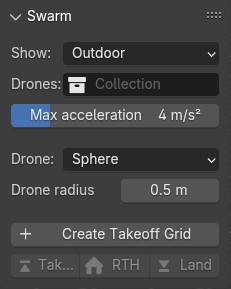
These panels contain some general configuration options you might want to review before starting your actual design workflow.
After configuring your workflow, move to the Formations panel on the Formations tab.
To initialize your drone show, first of all, press the Create Takeoff Grid button on the top of the Formations panel and check out the parameters in the popup window.
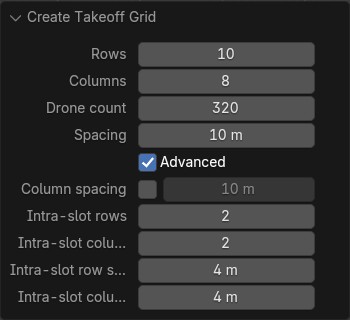
Setup your takeoff grid with any convenient parameters and press OK.
This will create all Skybrush-specific collections (Drones, Formations and Templates) that you will need for your drone show, will add the first "Takeoff grid" entry to the storyboard and will also initialize your drones in the 3D Viewport editor.
To learn more about the mentioned collections, please read the Key concepts and the Glossary.
2. Create takeoff procedure automatically
Drone shows typically consist of artistic formations and other technical parts that are usually not the responsibility of designers to deal with (such as takeoff, transitions between formations, return-to-home or the landing procedure). Skybrush Studio provides automated tools for handling these parts, if needed.
To take off your drones, simply press the Takeoff button on the Formations panel and setup the parameters of the automatic takeoff procedure.
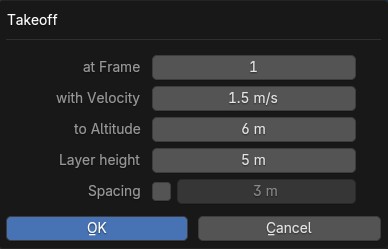
After you press OK on the Takeoff popup window, the "Takeoff" entry should appear in the Storyboard panel as the second entry.
3. Create formations
Formations are standalone parts of your final drone show, consisting of static or dynamic (animated) scenes.
The Formations panel will be your guide to deal with formations.
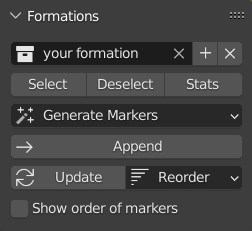
Use the + button on the Formations panel to create a formation as part of your drone show.
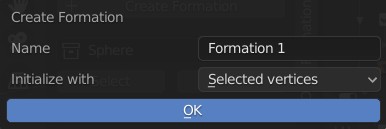
If you would like to create static formations, they can be initialized from many individual objects (one drone per object) or from selected vertices of a single mesh (one drone per vertex).
If you wish to create animated formations, you have two options:
-
You can create a static formation, which either creates empty meshes based on the current positions of the selected objects or vertices, or places the meshes themselves in the formation. There is a subtle difference between the two options: when the mesh itself is placed in the formation, you need to keep the mesh in the scene, while if you create empties based on the selected meshes or vertices, you can remove the meshes afterwards as Skybrush will use the empties instead. Typically, if you already have an animated mesh, you should put the mesh in the formation and switch it to wireframe mode or hide it in the 3D viewport and the render later on so you only see the drones in the final result. This way the animation attached to the mesh will also be followed by the formation.
-
You can create a vertex group of any vertices of an object in Blender’s Edit mode. Skybrush adds a dedicated property to each mesh that allows you to set the name of the vertex group that contains the vertices that should participate in the formation when the mesh itself is placed in the formation. By convention, this vertex group is usually called
Drones, but you are free to use any other name as you wish — just make sure that you set this name in the "Drone Show" panel of the "Object Data Properties" tab of the mesh in the Properties Editor.
Either way, make sure that the number of markers (vertices or objects) you use in a formation matches the size of your fleet. If your formation uses less markers than your fleet size, supplement it with placeholder objects so Skybrush knows where to send the extra drones that do not participate in the formation., If your formation contains more markers than the number of drones in your fleet, Skybrush will complain loudly when you try to recalculate the transitions between the formations.
| If you work with vertices in Edit mode, the Delete & Dissolve, the Loop cut and Slide, the Decimate Geometry and the Merge by Distance operators are your friends to create the expected number of vertices in a single object. |
Repeat this phase with all the formations of your drone show and create a separate formation collection for all of them. These collections will all be listed in the Formations collection in the Outliner.
4. Create a storyboard from formations
The storyboard defines the temporal structure of your drone show, consisting of formations coming one after another, with automatic or manual transitions between them.
Check out the Storyboard panel in the Formations tab.
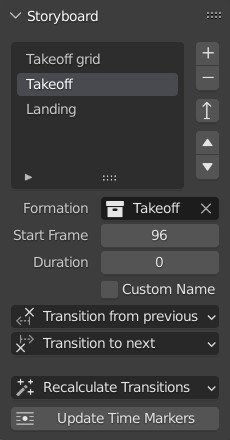
Add your formations to the storyboard, define their starting time and duration. Leave the transition type as Auto and the transition schedule as Synchronized for the time being to let Skybrush attempt to calculate the transitions between them. Later on you can experiment with more advanced, Manual and Staggered transitions, too.
| Make sure that the time intervals of the formations do not overlap and pay attention to use enough transition time for your drones between different formations in the storyboard. A typical transition is usually between 15 and 30 seconds, depending on the size and complexity of your formations and the velocity and acceleration constraints. |
5. Create automatic transitions
Use the Recalculate transitions button at the bottom of the Storyboard panel of the Formations tab to create optimal transitions between your formations automatically. This will assure that all drones from a starting formation are mapped to their optimal matching point in the target formation.
While transitions are created, your drones in the Drones collection will also be attached to all your formations. The animation part of your show is now almost ready…
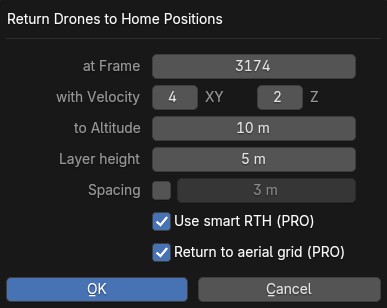
6. Add return-to-home and land to the end of your show
After all your artistic formations are ready, press the RTH and Land buttons on the Formations panel in the Formations tab to add automatic return-to-home and land procedures to your drones, the same way you added the takeoff procedure at the beginning.
Popup windows for each button appear to be able to setup the parameteres of these smart functions. On success, the proper entries should also appear at the end of your storyboard.
7. Check and verify your animation
Use the Safety Check panel in the "Safety & Export" tab in the sidebar of the Viewport editor to enable real-time verification checks on your animation.
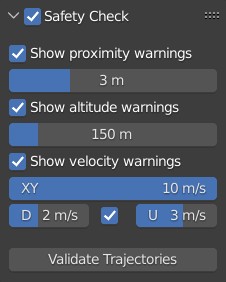
Setup your safety parameters with convenient values and watch your animation in the 3D Viewport editor. Drones and drone pairs not passing the safety checks (velocity, altitude, proximity) will be highlighted with red, while status information about the verification results will be visible on the left side of the window.
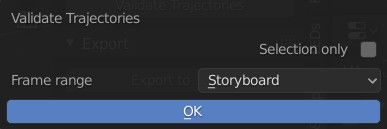
Press the Validate Trajectories button to get a full validation for a frame range, not just for a single frame (this might time some time depending on the number of your drones and the number of frames selected). The results will appear in Skybrush Viewer so make sure that the viewer is running as a separate application on your computer before pressing the button.
Correct your show to eliminate all safety check warnings to ensure maximal safety of your drones and the world below them…
8. Add lights to your show
After all your animations are finalized and verified, use the LEDs tab in the sidebar of the 3D Viewport editor to add light animation to your show.
The first panel of interest for light design is the LED Control panel.
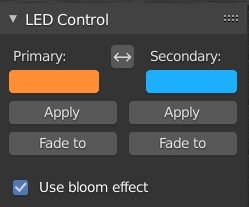
Move the scene to the desired frame, select the drones you wish to paint, select a color or two colors and press the Apply (change abruptly) or Fade to (fade linearly from last keyframe) buttons to add color animation keyframes to the given drones at the given frame.
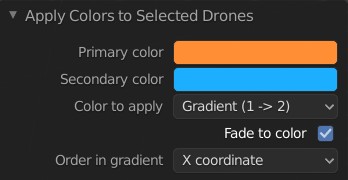
| Select two distinct colors in the LEDs tab and change the "Color to apply" property to one of the Gradient options in the popup panel to create more spectacular coloring schemes according to the "Order in gradient" property selection. |
As a more advanced option, use the Light Effects panel in the LEds tab to create more sophisticated, parametrized light effects for your show.
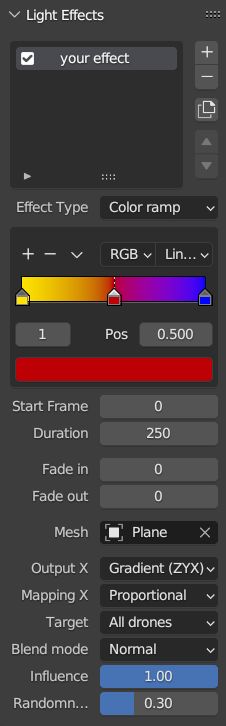
The effects defined in the "Light Effects" panel are calculated on-the-fly, frame by frame in Blender, based on several criteria, including the positions of the drones and an optional associated mesh, so it is possible to create light effects where the color depends on how far the drones are from a certain mesh in the scene or whether they are inside or outside an invisible "helper" mesh.
9. Add optional pyro or yaw control
There are additional options to make your drone shows even more spectacular, such as adding drone-launched fireworks to your shows or enhancing visuals with controlling the yaw angle of drones.
For adding pyro control please checkout the description of the Pyro Control panel.
For adding yaw control to your drones please use any standard Blender tools to change the orientation of your drone objects according to your needs.
| Both of these options require a professional license to be supported. |
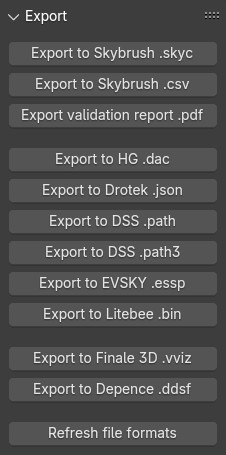
10. Export your show to .skyc
Once ready with both the animations and light program, use the Export to .skyc button of the Export panel on the "Safety & Export" tab to export your entire show into Skybrush compiled show format.
The Skybrush compiled show format is compatible with other components of the Skybrush suite:
-
If you wish to visualize or verify your show or you simply want to send a link with an interactive 3D visualization of the show to your clients, use Skybrush Viewer.
-
If you want to execute your drone show on your real drones, use Skybrush Live.
The Export to .csv button of the Export panel allows you to sample the drone trajectories and the corresponding RGB colors at regular intervals and save them to a CSV file that you can load in external tools for further post-processing.
The Export to validation .pdf button creates a unique safety report of your show in .pdf format for self-checking, validated reporting or as a supplement for flight permissions.
If you are a professional license holder, please press the Refresh file formats to get a full list of additional third-party export formats that your license supports.
11. Enjoy
We are done. Check out your show in Skybrush Viewer or execute it with Skybrush Live. Enjoy, send us feedback or ask us if you have any questions!