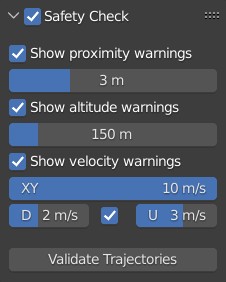
Safety Check panel
The Safety Check panel lets you perform real-time frame-level or full post-processed verification of your drone animation to aid you towards completely safe drone flighs.
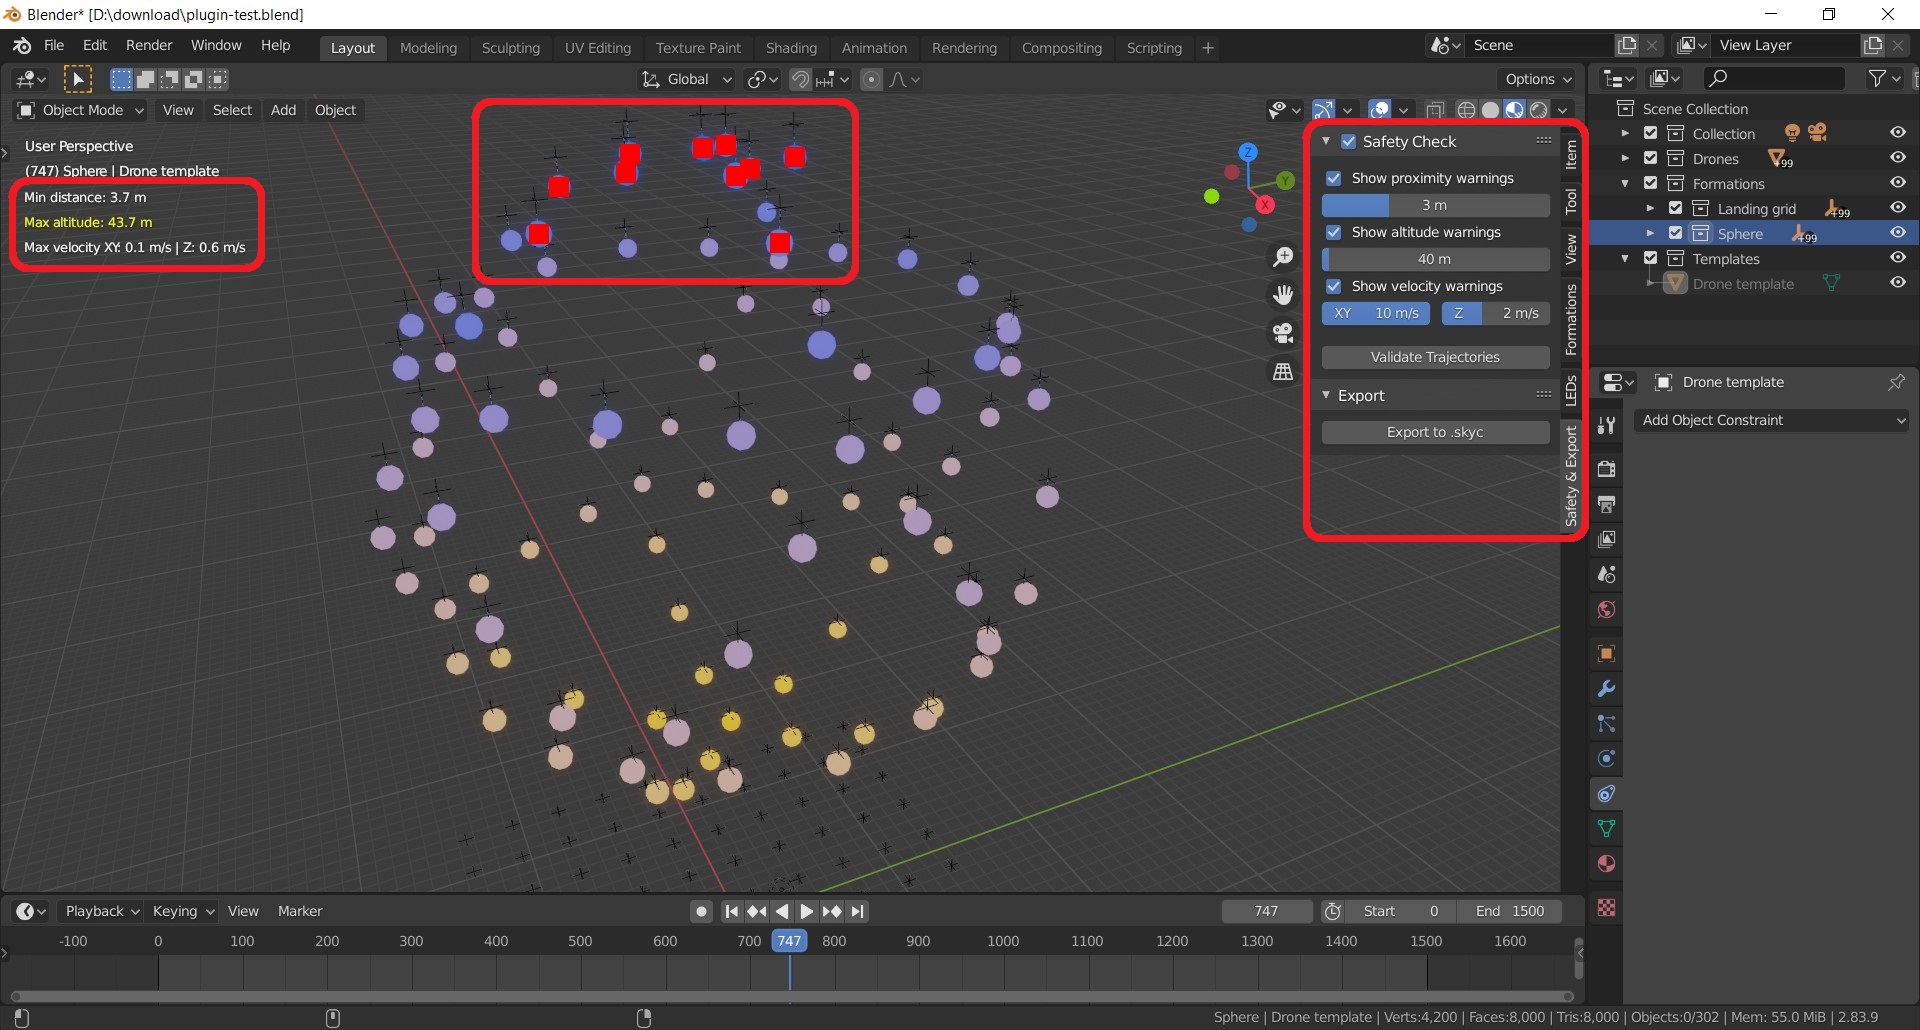
Safety warnings of the current frame appear in real time as text on the left side of the 3D Viewport editor, while drones with warnings are also highlighted in real time with different colors according to the violation type as seen in the image below.
Safety Check checkbox
The checkbox at the top left corner of the panel allows you to disable the safety checks entirely, although it is advised not to do so. One valid reason for disabling them temporarily is if you feel that the Blender UI has become sluggish and that the safety checks are responsible for that. The safety checks should have negligible impact on the overall performance of Blender so let us know if you found a situation where disabling the safety checks improved Blender’s responsiveness significantly.
Proximity warnings
This option lets you define a minimum safety distance between your drones. If there are drones at the given frame that are closer to each other than this safety distance, you get real-time proximity warnings.
By default, the proximity warning is limited to drones above the minimum navigation altitude only (see below in the section about altitude warnings). This is to prevent spurious warnings about drones being too close in the takeoff grid. You can change this in the panel by choosing between the "All drones" and "Drones abouve min altitude" setting.
The text-based proximity warning on the left side of the 3D Viewport editor always shows you the minimum distance between all drone pairs on the current frame. This drone pair is also highlighted with red, along with a red line connecting them.
To enable or disable proximity warnings, use the Show proximity warnings checkbox.
| Distances are measured between the centers of the drones, not between their edges. A safety distance of 3 meters with a drone whose arm length is 450mm means that you have less than two meters between the drones when the safety distance is breached, so make sure that you take the arm length and the props into account. Skybrush Studio is unaware of the physical dimensions of the drones. |
Altitude warnings
This option lets you define a minimum and a maximum altitude for your drone show. If there are drones above the maximum altitude (measured along the Z axis), or drones moving horizontally below the minimum altitude, you get real-time altitude warnings.
The text-based altitude warning on the left side of the 3D Viewport editor always shows you the overall altitude range of drones on the current frame. Drones above the altitude threshold at a given frame are highlighted in yellow.
To enable or disable altitude warnings, use the Show altitude warnings checkbox.
Velocity warnings
This option lets you define a maximum horizontal and vertical speed for your drone show (vertical speed can be further differentiated into maximum up and down speed). If there are drones above these velocity limits, you get real-time velocity warnings.
The text-based velocity warning on the left side of the 3D Viewport editor always shows you the maximum horizontal (XY), upwards (U) and downwards (D) velocity of drones on the current frame. Drones above the velocity thresholds at a given frame and drones moving horizontally below the minimum navigation altitude threshold are highlighted in blue.
To enable or disable velocity warnings, use the Show velocity warnings checkbox.
Acceleration warnings
This option lets you define a maximum acceleration for drones in your drone show. If there are drones above the acceleration limit, you get real-time acceleration warnings.
The text-based acceleration warning on the left side of the 3D Viewport editor always shows you the maximum acceleration of drones on the current frame, irrespectively of the direction (horizontal or vertical). Note that acceleration is treated as an unsigned quantity: accelerations and decelerations are not distinguished. Drones above the acceleration threshold at a given frame are highlighted in magenta.
To enable or disable acceleration warnings, use the Show acceleration warnings checkbox.
Finding all drone pairs closer than the proximity warning threshold
Real-time proximity warnings that are running during playback must be fast, therefore we cannot afford finding all pairs of drones in a frame that are closer than the proximity threshold by default; only one such pair will be marked in the 3D view. However, if you see a proximity warning marker and you suspect that there might be more pairs of drones that violate the proximity threshold in the current frame, you can ask for a full, exhaustive scan of all pairs of drones by pressing the Calculate All Proximity Warnings button. This will refresh the current frame and mark all pairs of drones that are too close to each other.
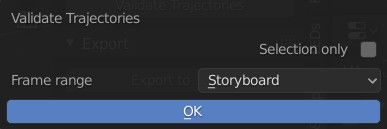
Validating full or partial trajectories
Press the Validate Trajectories button to execute a full validation for a frame range instead of only for a single frame. This might take some time depending on the number of drones and the number of frames selected.
The validation results are shown in Skybrush Viewer so make sure you start Skybrush Viewer first. The Blender add-on and the viewer app will find each other behind the scenes automatically.
In particular, Skybrush Viewer will offer you the following set of zoomable charts:
-
Altitude range of all the drones as a function of time, or the exact altitudes of the drones that you select on the sidebar of Skybrush Viewer.
-
Horizontal and vertical velocity range of all the drones as a function of time, or the exact horizontal and vertical velocities of the drones that you select on the sidebar of Skybrush Viewer.
-
Distance of the closest drone pair as a function of time.
All the charts will also indicate the thresholds selected in the Safety Check panel so you can quickly decide whether any of the chart lines breach the safety limits.