UAVs
The UAVs panel provides a comprehensive overview of the used UAVs in a compressed or list form. The list form contains much more individual information, but the number of UAVs visible at once is less. The compressed form is optimized to show only the most important status information, but for as many drones as possible in minimal space.
To change between the list and compressed views, press the corresponding buttons on the top right corner of the panel.
List view
In the list view, every line corresponds to one UAV. Each line shows the physical and show ID of the UAV, its overall status, flight mode, battery level, GPS fix state, position, altitude, heading, actual color and other show-specific details.
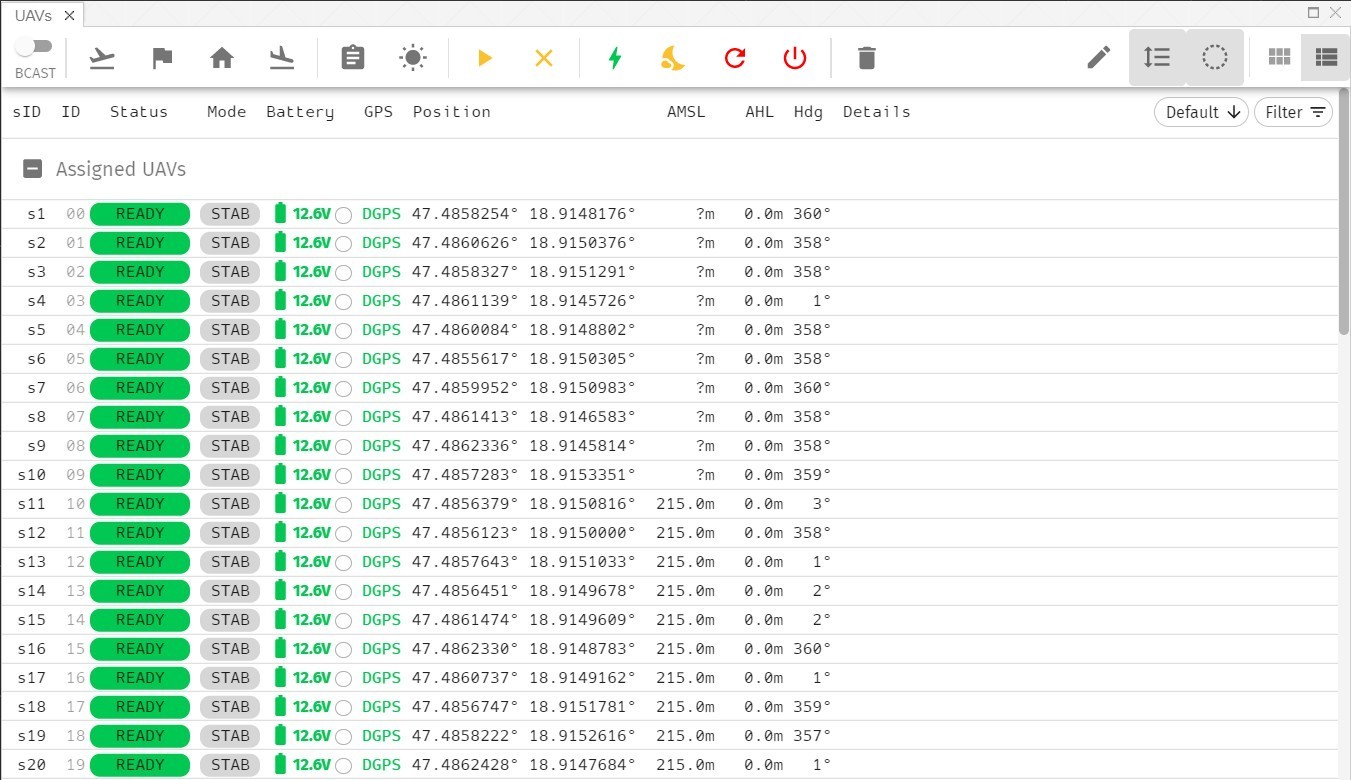
The green color represents flawless functions, as everywhere in Skybrush Live.
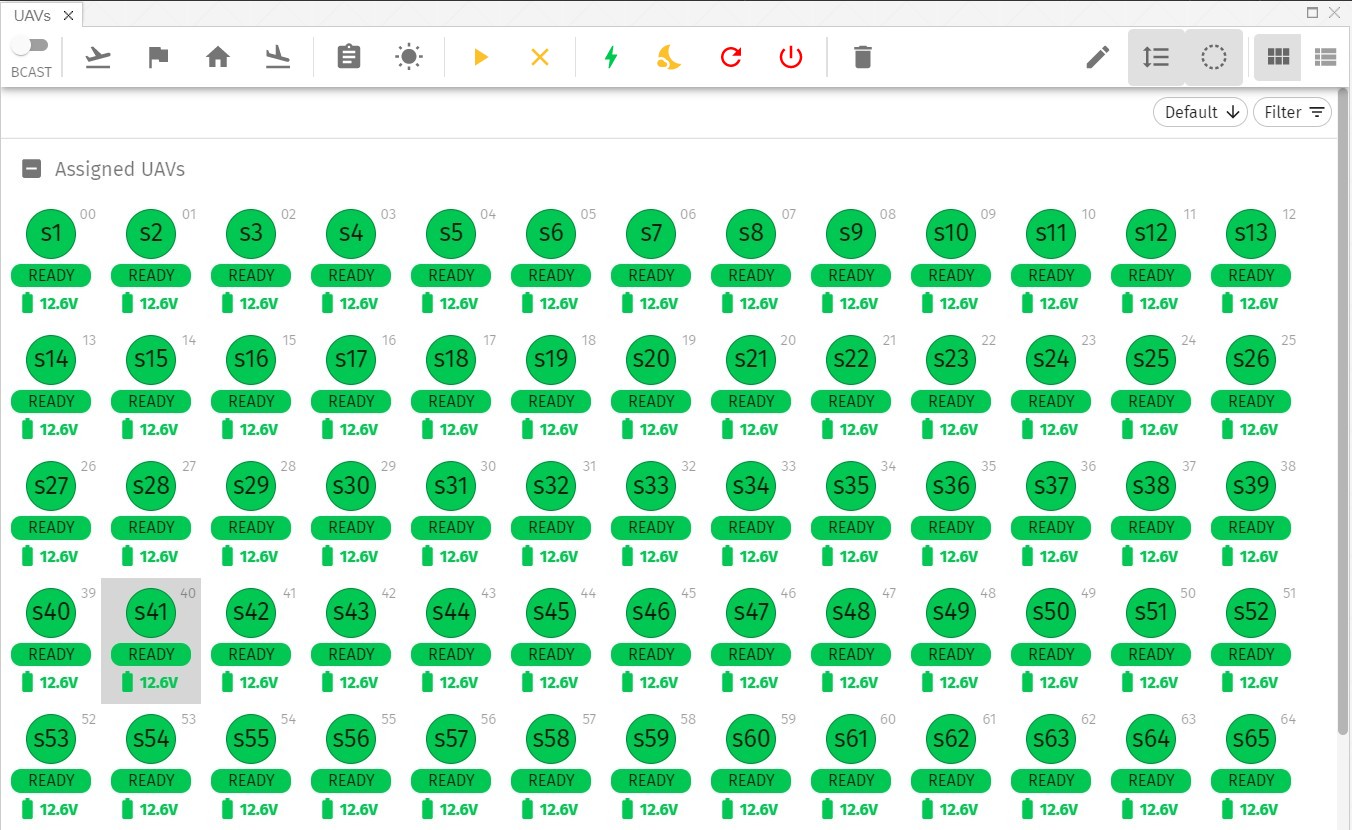
Compressed view
In the compressed view each UAV is shown as a small icon with only the most important information on it: physical and show ID, overall status (also indicated by color) and battery level.
Grouping UAVs
The UAV lists are separated into groups. The name of each group is always written above the actual group, with a checkbox on its left that allows selection of the whole group with a single click.
Depending on the mode used (e.g., normal mode or mission ID assignment mode) different groups are created automatically.
Sorting UAVs
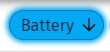
UAVs in both the list view and the compressed view can be sorted according to different features, such as mission or physical IDs, battery levels, altitude etc. To change the key according to which UAVs are sorted, press the oval Sort by button at the right side of the UAV list header.
The actual sorting key is displayed on the button (the default is "Default").
You can also switch between ascending or descending sorting by clicking on the arrow on the right side of the Sort by button or by selecting "Ascending" or "Descending" from the popup list when the button is pressed.
Sorting is done within each UAV group separately.
In the list view, the sorting key can also be selected by clicking on the corresponding header element. The actually selected sorting key is highlighted with an underscore. To change between ascending/descencing sorting, press the given header once more.
Filtering UAVs
When working with a lot of drones at the same time, it is very useful to get a filtered view based on different criteria. This can be done by the oval Filter by button at the right side of the UAV list header.

The actually selected filter is displayed on the button and the color of the button changes according to the filter used.
Currently the following filters can be selected:
-
Warnings and errors
-
Errors only
-
Inactive UAVs only (no telemetry for a while)
| Filtering should be treated as a lower bound on the severity level of the actual status of the UAVs (i.e. "All" contains all UAVs, "Warn/Err" contains UAVs with warnings OR errors and "Errors" contains UAVs with errors only). The advantage of this concept is safety: errorous UAVs can never be hidden by the users. |
Show ID assignment
If multiple UAVs are used in the same mission, the trajectories of the mission (show ID) need to be mapped to the physical drones (physical ID).
Show ID assignment can be changed manually, or automatically.
To change the mapping from the UAVs panel, you need to press the Edit mapping icon at the top left corner of the panel to enter edit mode.
Automatic show ID assigment
For an automatic mapping between show IDs and physical IDs you need to prepare the followings:
-
Load a mission
-
Setup the home/takeoff positions
-
Position your drones to your physical takeoff positions in any order
If you are done, and you are in edit mode, select Assign spares from the edit mode menu at the top left corner of the panel.
| You can also use the Setup takeoff area button on the Show control panel to perform the automatic mapping. |
Manual show ID assignment
Once the mapping tool at the top of the UAVs panel is in edit mode, you can assign physical IDs to individual show IDs. Always follow the instructions on the top of the panel. Note that show ID representations are always preceeded with an 's' to be easily distinguishable from physical IDs (e.g. s05).
If done, press the Exit mapping icon to save the current mapping.
Mapping import and export
Mappings can be exported to and imported from simple text files containing two columns: show IDs and corresponding physical IDs
To import or export a mapping enter mapping edit mode and select the corresponding function from the edit mode menu at the top left corner of the UAVs panel.
Show ID sorting and filtering
There are two further icons at the top left corner of the UAVs panel:
- Sort by mission IDs
-
Press this icon to change the ordering of drones from physical IDs to mission IDs.
- Hide empty mission slots
-
Press this icon to hide all show IDs that are not yet assigned to any physical IDs.
UAV control
The list view allows for individual or swarm control of UAVs to a limited extent. The left part of the toolbar contains control buttons that send specific control commands for the selected UAVs in an unicast manner.
| If you wish to broadcast a certain command to all drones, press the Broadcast widget (or the Ctrl-B hotkey) to enable broadcast mode for 5 seconds. The broadcast toggle automatically switches back to unicast mode after five seconds to prevent you from accidentally triggering a command on all drones when you do not intend to do so. |
The following control commands are present on the toolbar of the UAVs panel:
- Takeoff
-
Send takeoff command to the selected drones. Note that this might not take any effect in certain flight modes where GCS-based control is not allowed.
- Position hold
-
Switch selected drones to position hold mode.
- Return to home
-
Send the return to home command to selected drones. Note that the exact return to home maneuver might depends on autopilot-specific settings, such as the return to home altitude or travel speed. Also note that if your drones do not have internal collision avoidance, then returning multiple drones to home might result in trajectory conflicts and possible collisions. Use with care!
- Land
-
Send the land command to selected drones.
- Properties
-
Open the properties dialog of the selected drone (enabled only for a single drone).
- Flash lights
-
Flash the lights of the selected UAVs 5 times in quick repetition. This feature is very useful for finding a certain drone out of the field or simply to test the communication with a given drone.
- Arm motors
-
Send the arm command to selected drones. Note that depending on the actual state of the autopilot the arm command might not take any effect due to safety reasons. Use with care!
- Disarm motors
-
Send the disarm command to selected drones. Note that disarming drones in flight might crash them if inflight disarming is allowed on the given autopilot. Use with care!
- Power on
-
Send a wake up signal to selected drones. Note that the wake up feature is not supported on most off-the-shelf drones at the moment as it requires hardware modifications. In particular, the drone needs to be equipped with a dedicated power management module that can capture the messages sent to the drone from the ground station and recognize Skybrush-specific power management messages. contact us if you are interested in adding support for this feature in your own drones.
- Sleep
-
Send a sleep command to selected drones that will bring them into a low power mode if their hardware is equipped with such a power management feature (see description for the Power on button). Sleep mode can be used to simplify and automate your workflow; for instance, you can turn on all drones before a show, upload the show trajectories to them, and then send them to a low-power sleep mode and wake them up only a few minutes before the show — all at once from Skybrush — to let them gain an accurate GPS RTK lock before takeoff.
- Reboot
-
Send a reboot command to the low-level autopilot of your drone. Note that the reboot command does not cut the power of neither your autopilot, nor its peripherals, and only reboots the autopilot itself and nothing else. Use with care when your drones are in flight as a reboot can result in a crash if in-flight reboot is allowed by your autopilot.
- Power off
-
Completely turn off selected autopilots. This button can be used as an integrated kill switch for emergency situations. Use with care as in flight usage of the power off button results in a drone crash for sure. If your flight authorities require an independent kill switch to be present in your system, use Skybrush Sidekick!
| Use all control commands with care! Taking of and flying with a single or multiple UAVs is your sole responsibility. Do that only if you have already prepared your drones and yourself for the proper mission and its emergency situations. |