UAVs
The UAVs panel provides a comprehensive overview of the used UAVs in a compressed or list form. The list form contains much more individual information, but the number of UAVs visible at once is less. The compressed form is optimized to show only the most important status information, but for as many drones as possible in minimal space.
To change between the list and compressed views, press the corresponding buttons on the top right corner of the panel.
List view
In the list view, every line corresponds to one UAV. Each line shows the physical and show ID of the UAV, its overall status, flight mode, battery level, GPS fix state, position, altitude, heading, actual color and other show-specific details.
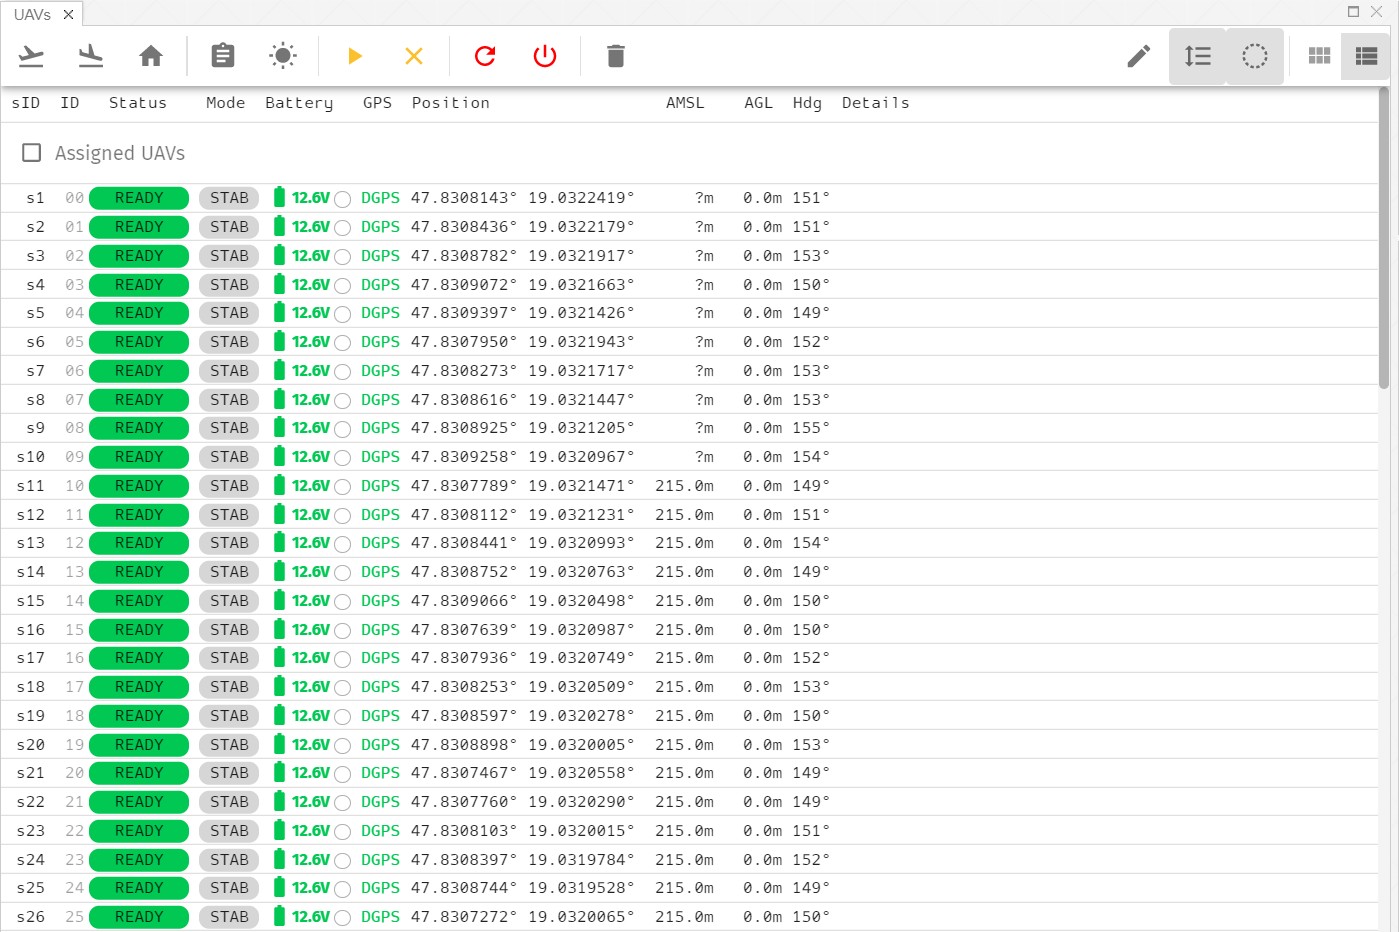
The green color represents flawless functions, as everywhere in Skybrush Live.
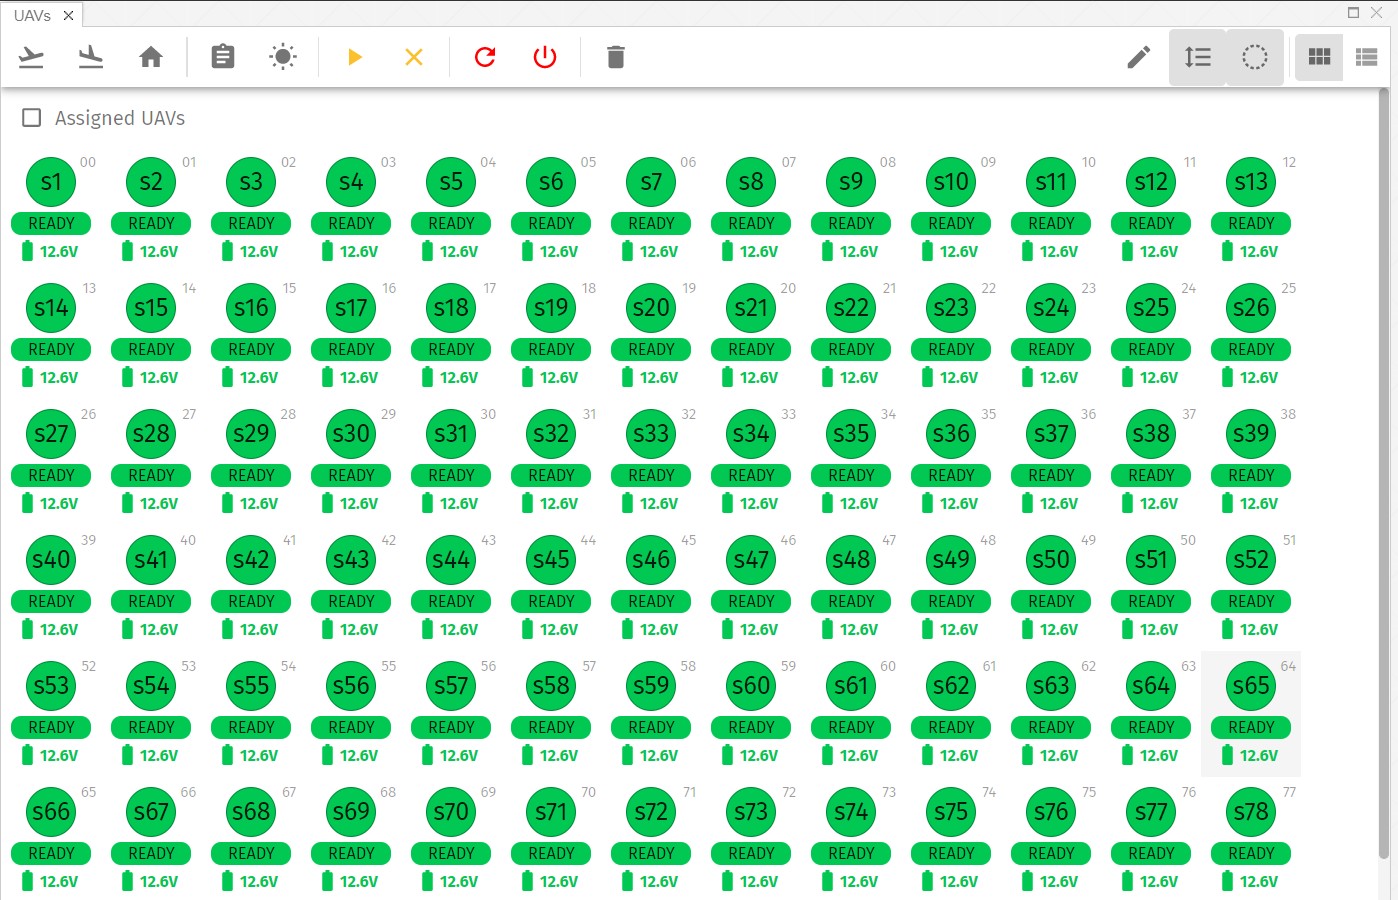
Compressed view
In the compressed view each UAV is shown as a small icon with only the most important information on it: physical and show ID, overall status (also indicated by color) and battery level.
Show ID assignment
If multiple UAVs are used in the same mission, the trajectories of the mission (show ID) need to be mapped to the physical drones (physical ID).
Show ID assignment can be changed manually, or automatically.
To change the mapping from the UAVs panel, you need to press the Edit mapping icon at the top left corner of the panel to enter edit mode.
Automatic show ID assigment
For an automatic mapping between show IDs and physical IDs you need to prepare the followings:
-
Load a mission
-
Setup the home/takeoff positions
-
Position your drones to your physical takeoff positions in any order
If you are done, and you are in edit mode, select Assign spares from the edit mode menu at the top left corner of the panel.
| You can also use the Setup takeoff area button on the Show control panel to perform the automatic mapping. |
Manual show ID assignment
Once the mapping tool at the top of the UAVs panel is in edit mode, you can assign physical IDs to individual show IDs. Always follow the instructions on the top of the panel. Note that show ID representations are always preceeded with an 's' to be easily distinguishable from physical IDs (e.g. s05).
If done, press the Exit mapping icon to save the current mapping.
Mapping import and export
Mappings can be exported to and imported from simple text files containing two columns: show IDs and corresponding physical IDs
To import or export a mapping enter mapping edit mode and select the corresponding function from the edit mode menu at the top left corner of the UAVs panel.
Show ID sorting and filtering
There are two further icons at the top left corner of the UAVs panel:
- Sort by mission IDs
-
Press this icon to change the ordering of drones from physical IDs to mission IDs.
- Hide empty mission slots
-
Press this icon to hide all show IDs that are not yet assigned to any physical IDs.
UAV control
The list view allows for individual or swarm control of UAVs to a limited extent. Use the top left corner of the toolbar of the UAVs panel to send one of these commands to the selected drones:
-
Takeoff
-
Land
-
Return to home
-
Open properties dialog
-
Flash lights
-
Arm motors
-
Disarm motors
-
Reboot
-
Power off
| Use with care! Taking of with a single or multiple UAVs is your sole responsibility. Do that only if you have already prepared your drones and yourself for the proper mission. |